If you want to know how to make carved pumpkins last longer, we’ve got the ultimate pumpkin preservation guide just for you. A step-by-step guide of secrets to keeping your carved pumpkins fresh. These tips and tricks will maximize the lifespan of your jack-o-lanterns, ensuring that your beautifully carved pumpkins stay vibrant and spooky on your doorstep all Halloween season.
This post contains affiliate links. Should a purchase be made, Love Beauty Thrive may receive a small commission at no added cost to you. Affiliate disclosure is available here. Thank you.
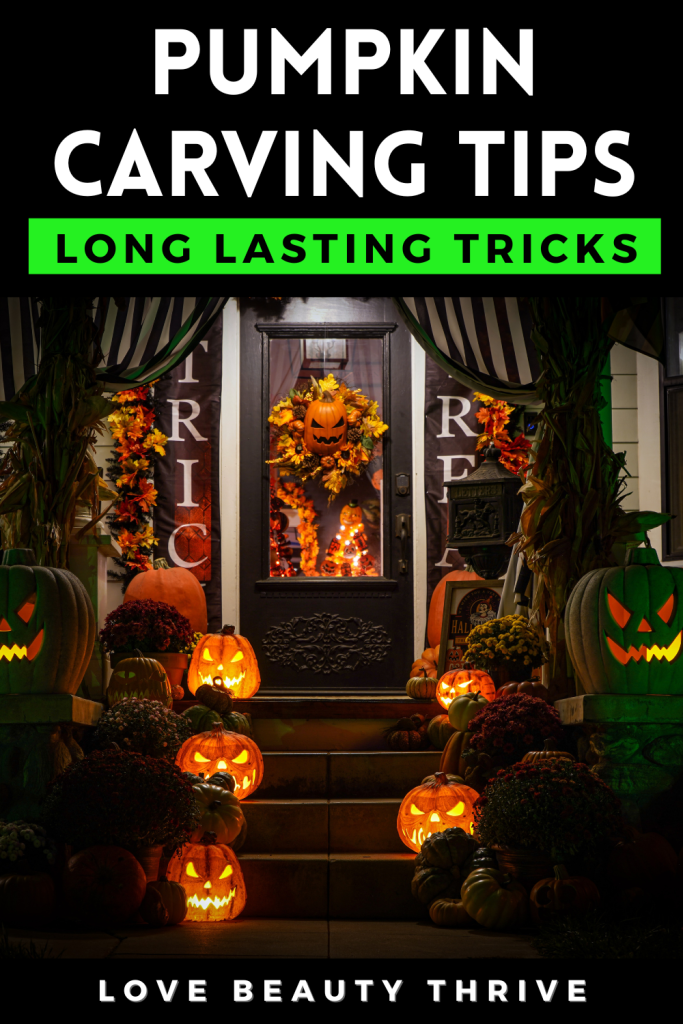
How to Make Carved Pumpkins Last Longer
Do you need expert tips and tricks to make carved pumpkins last longer? Enjoy their beauty for weeks to come with our step-by-step guide of the best secret tips! Don’t let your hard work go to waste – use this ultimate pumpkin preservation guide to keep your Halloween masterpieces fresh and impressive all season. Are you ready to get started? Let’s get carving!
Ultimate Pumpkin Preservation Guide
As the crisp autumn air settles in and the leaves begin their vibrant transformation, there’s one tradition that captures our imagination and ignites our creativity: pumpkin carving. But all too often, our intricately carved jack-o-lantern designs shrivel into sad, sagging remnants of their former glory. It’s a heartbreak we’ve all experienced. That’s why today, we’re unveiling the ultimate pumpkin preservation guide, your go-to resource to make carved pumpkins last longer than ever before.
In this article, we’ll dive into the art of pumpkin preservation, exploring every step from choosing the perfect pumpkin to displaying and storing your creations. We’ll equip you with expert tips and tricks to ensure your hard work lasts all through Halloween. But before we embark on this journey, let’s take a moment to appreciate the importance of preserving these Halloween masterpieces.
Did you know that approximately 2 billion pounds of pumpkins are cultivated each year in the United States alone? That’s enough to fill more than 107,000 school buses! Yet, despite this abundance, most carved pumpkins meet an untimely demise, turning into nothing more than moldy heaps within a matter of days – even before Halloween, eek! But fear not. Our comprehensive guide will empower you with the knowledge and techniques needed to extend the lifespan of your spooky creations, making sure that you can showcase your eeriest pumpkin carvings on your doorstep this Halloween. You don’t want rotten pumpkins for the big night!
We’ll begin by walking you through the essential step of first choosing the perfect pumpkin, providing insights into finding the ideal shape, size, and variety that will maximize longevity. From there, we’ll explore the crucial preparatory steps to ensure your pumpkin is primed for carving success.

Pumpkin Carving Tools (10-Piece Kit)
BUY ON AMAZON
Once your canvas is ready, we’ll delve into the art of carving techniques specifically designed to prolong the life of your pumpkin. Discover the secrets of strategic cuts, supportive structures, and innovative approaches that will keep your designs intact for weeks.
But preserving your carved pumpkins doesn’t stop at the carving itself. We’ll also reveal simple yet effective methods to extend their freshness, including treatments to combat decay and seal in the exact right amount of moisture (too little or too much can be a pumpkin problem).
Lastly, we’ll guide you through the all-important steps of displaying and storing your pumpkins to maintain their beauty and prevent premature deterioration.
Before we get to all the exciting details, you might need some pumpkin carving treats to sustain your creativity and inspiration along the way. Be sure to check out our recent post, Decorate Halloween Sugar Cookies Like a Pro.
And if you’re in need of some of the best spooky entertainment to indulge in while you carve pumpkins, we’ve got lots of great suggestions for you in our post, The 35 Best Halloween Movies For Kids & Families.
By following this ultimate pumpkin preservation guide, you’ll finally be able to showcase your Halloween masterpieces with pride, looking as fresh as ever. Say goodbye to withered and wretched pumpkins – and welcome a world where your carvings stand tall as a testament to your artistry. So, let’s roll up our sleeves and start mastering the art of preserving pumpkins together! Let’s get ready to make carved pumpkins last longer than ever before . . .
Choosing the Perfect Pumpkin
Before you can begin preserving your pumpkin masterpieces, you need to start with the perfect canvas. If you want to know how to make carved pumpkins last longer, one of the most important secrets is the pumpkin itself. The key to a long-lasting and impressive pumpkin carving lies in selecting the right pumpkin from the very beginning. But how do you choose the perfect pumpkin?

First and foremost, size matters. You want a pumpkin that is big enough to carve a detailed design, but not so large that it becomes unwieldy. Look for a pumpkin that is about 10 to 12 inches in diameter, as this size offers a good balance between carving ease and visual impact.
Next, give the pumpkin a thorough inspection. Look for any soft spots, dents, or bruises on the surface. A healthy pumpkin should be firm and free of blemishes. Remember, even the smallest imperfection can quickly lead to rot and ruin your carving ambitions.
Consider the shape of the pumpkin as well. While most pumpkins are round, you may come across some that are more oval or elongated. Take a moment to envision the design you have in mind and choose a pumpkin shape that will enhance it. A round pumpkin is a classic choice that works well for many designs, but don’t be afraid to venture outside the norm if it suits your creative vision.

Halloween Moments Pumpkin Scraper Glove (As Seen On Shark Tank)
BUY ON AMAZON
Furthermore, the weight of the pumpkin can provide valuable insight into its quality. A heavy pumpkin typically indicates that it is dense and has a thick, solid flesh. On the other hand, a lighter pumpkin may be more prone to drying out and deteriorating quickly.
Lastly, pay attention to the stem. A sturdy stem not only adds character to your pumpkin carving, but it also indicates freshness. Look for a pumpkin with a stem that is firmly attached to the body and shows no signs of mold or decay. A green stem is a good sign, as it suggests the pumpkin has been freshly harvested.
By following these guidelines, you’ll be able to select the perfect pumpkin for your carving endeavors. Remember, a high-quality pumpkin is the foundation for a stunning and long-lasting Halloween masterpiece (it’s one of the most important key steps to make carved pumpkins last longer). With your chosen pumpkin in hand, you’re now ready to move on to the next section and start preparing it for carving.
Preparing Your Pumpkin for Carving
A key step in ensuring the longevity of your pumpkin carving masterpiece is to properly prepare your pumpkin even before you pick up a carving knife. By taking a few simple precautions, you can maximize the lifespan of your pumpkin and ensure that your hard work pays off.
One of the first things to consider when preparing your pumpkin is its overall appearance. Similar to what we just discussed above, double check that your pumpkin is still free from any blemishes or major discolorations. While minor imperfections can add charm, deep cuts, soft spots, or bruising may indicate that the pumpkin is already starting to decay in certain areas (which can then quickly spread to the rest of your pumpkin). Ensuring that your pumpkin continues to have a smooth and unblemished surface will help it last much longer once it’s carved.
You may also wish to check the stem once more as well, before you begin carving. A great stem definitely adds character to your pumpkin, but if you want to make carved pumpkins last longer, it’s important to be sure that it is firmly attached with no signs of decay, rot or mold of any kind (as this is one of the best indications of a pumpkin’s freshness, and in turn of its potential longevity).

Halloween Pumpkin Carving Kit (11-Piece Tool Set)
BUY ON AMAZON
Once you’re sure that your pumpkin is still in perfect condition, it’s time to prepare it for carving. Begin by cleaning the pumpkin’s entire surface. Using a damp cloth, gently wipe your pumpkin’s surface to remove any dirt or debris. You’ll want to be gentle to avoid damaging the pumpkin’s skin, as this can quickly lead to rot and decay. Remember, taking steps to prepare a high-quality pumpkin is the foundation for a stunning and long-lasting Halloween piece of art, setting the stage for the specific carving techniques that will extend its lifespan even further. Next, let’s find out the exact ways to make carved pumpkins last longer (i.e., exactly how to carve them for longevity) . . .
Carving Techniques for Longevity
Before diving into the exciting world of pumpkin carving, it’s important to consider the techniques that can help extend the lifespan of your creations. By following these expert guidelines, you can ensure that your carved pumpkins not only look amazing on Halloween night but also continue to dazzle for days to come. These are the specific carving techniques you need to know, to make carved pumpkins last longer . . .
The Right Carving Tools
First and foremost, it’s crucial to choose the right tools for the job. Opt for sharp, serrated knives specifically designed for pumpkin carving. These specialized tools make cutting through the thick skin and flesh of the pumpkin much easier and smoother, reducing the chances of accidental breakage or damage. Additionally, consider having a few different sizes of knives on hand to accommodate various details and intricacies in your designs. Several examples of bestselling pumpkin carving tool sets have been provided for you throughout this post (and more are listed below, so be sure to read on).
Create a Lid (The Right Way)
When it comes to actually carving your pumpkin, there are a few key techniques that can greatly impact its longevity. Start by creating a lid that fits snugly on top of the pumpkin, ensuring a secure seal that prevents excessive airflow and drying. Rather than cutting the lid in a traditional circular shape, try cutting it at an angle to create a ledge that the lid can rest on, further preventing it from falling inside the pumpkin.
Gut the Pumpkin
Next, it’s time to gut your pumpkin (i.e., clean it out). Use a large spoon, scoop or pumpkin scraping gloves to remove the seeds and pulp from the interior. Be thorough in this step to clean the inside of your pumpkin, as excess moisture can lead to mold growth. Save the seeds if you want to roast them later for a tasty snack.
Thin the Pumpkin Walls
Thinning the pumpkin walls is another longevity step you can consider. To make your carved design more visible and to help the pumpkin last longer, thin the inner walls. Use a scraper, the edge of a spoon or a specialized carving tool to remove about 1/2 to 1 inch of pumpkin flesh. Thinning the walls reduces the chance of the pumpkin becoming too moist and rotting prematurely.
Consider a Bleach Solution
If you want to further extend the life of your pumpkin, you might also consider treating it with a bleach solution. Mix one tablespoon of bleach with one quart of water and apply it to the interior of the pumpkin after it has been gutted and the walls thinned (if you choose to do so). You can use an older, clean sponge or cloth to apply the bleach solution, understanding that the bleach may strip its color (and of course, take care to protect your hands in the process too). The bleach solution helps to kill any bacteria or mold spores that may cause decay. Allow the pumpkin to dry completely before carving.
Correct Carving Techniques
Now that your pumpkin is prepped, it’s time for the fun part: carving! Use sharp, fine-toothed carving tools for intricate designs. Make clean, deliberate cuts, as jagged edges can lead to quicker rot. Remember to handle your pumpkin gently to avoid damaging it during the carving process.
For the actual carving, use a gentle sawing motion rather than applying excessive force. This allows for a smoother cut and reduces stress on the pumpkin’s walls, especially if you’ve chosen to also thin them. Take your time and carve slowly, focusing on small sections at a time. By doing so, you’ll minimize the risk of accidentally removing too much pumpkin flesh, which can weaken the structure and lead to faster deterioration.
Protect the Cut Edges
To prolong the life of your carved pumpkin even further, consider using petroleum jelly or vegetable oil to coat the cut edges. This simple step creates a barrier that helps retain moisture and prevents premature drying. By sealing these vulnerable areas with a protective layer, you can preserve the integrity of your pumpkin design and ensure it lasts longer.
By employing these techniques to make carved pumpkins last longer, you’ll set the stage for the next section on preserving your carved pumpkins, where we’ll explore additional strategies to keep your creations looking fresh and vibrant throughout the Halloween season. Next, we’ve got more tips and tricks to make carved pumpkins last longer.
Displaying and Storing Your Pumpkins
To prolong the life of your carved pumpkin even further, it’s crucial to be mindful of where you display your pumpkin. If you want to enjoy your spooky creation for an extended period, it’s very important that you take steps to protect it from the elements. It’s one of the most effective steps to make carved pumpkins last longer. Let’s start with where to keep or store your carved pumpkins before displaying them . . .
Direct sunlight and extreme temperatures can accelerate the decomposition process, causing your masterpiece to wither and fade before Halloween even arrives. To prevent this, find a cool, shaded area for your carved pumpkin when it’s not on display. This simple act can significantly extend its lifespan and keep it looking fresh for weeks.
When it comes to storing your pumpkins, it’s important to choose the right environment. Ideal storage conditions would include a cool, dry place with good ventilation. Moisture can be the enemy, so be sure to keep your pumpkin away from damp areas and avoid wrapping it in plastic, as this can trap moisture and lead to mold growth.

Messermeister Pumpkin Meister Carving Kit (3-Piece Set)
BUY ON AMAZON
Consider using a clean, dry towel to carefully cover your carved pumpkin during storage. This can help protect it from dust and bumps that may occur while it’s not on display. If you have multiple pumpkins, it’s best to store them individually to prevent any potential damage or spreading of mold.
What about displaying your carved pumpkins? You’ll definitely always want to keep your pumpkin away from direct sunlight and extreme temperatures, as these as easily speed up the decomposition process. Display your carved pumpkin in a cool, shaded area to reduce exposure to direct sunlight and heat. If weather conditions call for rain or freezing temperatures, bring your pumpkin indoors (using the storage tips just discussed) as extreme weather can also accelerate decay.
By following these simple tips for displaying and storing your pumpkins, you can ensure they remain in optimal condition for as long as possible. With the right care and attention, your creations will be the envy of the neighborhood throughout the Halloween season. You’ll be well on your way to make carved pumpkins last longer!
Need More? Make Carved Pumpkins Last Longer
Throughout this post, we’ve shared with you some of Amazon’s popular and highly-rated items to help you make carved pumpkins last longer (and have lots of carving fun). From overall picks and bestselling pumpkin carving tool kits and sets, to pumpkin scraping gloves as seen on Shark Tank, and more. There is sure to be a perfect choice for everyone’s pumpkin carving needs.
In case you need even more possible selections of pumpkin carving tools, here are three more popular choices available on Amazon that are sure to help you bring your Halloween jack-o-lanterns to the next level this season. Get ready to have some fun while you make carved pumpkins last longer than ever before! You’ll be sure to craft the spookiest, most terrifying pumpkin on the block.

Halloween Pumpkin Carving Tool & Mold Set (24-Piece)
BUY ON AMAZON

Pumpkin Gutter Carving Tool
BUY ON AMAZON

Flameless Halloween Pumpkin Lights (24-Pack)
BUY ON AMAZON
Make Carved Pumpkins Last Longer
By following the expert tips and tricks outlined in this guide, you are equipped with the knowledge to make your pumpkin carvings last longer and maintain their beauty for weeks on end. From choosing the perfect pumpkin, to preparing it for carving, employing longevity-focused techniques, preserving your masterpieces, and finally displaying and storing them, every step is crucial to ensuring your Halloween creations withstand the test of time.
Remember, don’t let your hard work go to waste. Put these techniques into practice and enjoy the lasting impressiveness of your pumpkin carvings. Embrace the awe-inspiring glow they bring to your Halloween festivities, even weeks after the big night.
But it doesn’t end here. Let this ultimate pumpkin preservation guide be just the beginning of your journey into the world of creativity and craftsmanship. With each passing year, challenge yourself to push the boundaries of pumpkin artistry and discover new ways to preserve and showcase your designs – that is, make carved pumpkins last longer!
So, as the air grows crisper and the leaves fall, embrace the spirit of Halloween and seize the opportunity to create something extraordinary. Carve with passion, preserve with care, and let your imagination run wild. Go forth and create your pumpkin masterpiece, knowing that it will endure and inspire for weeks to come (and as always, be careful and use all safety precautions while carving or any time you’re using sharp tools).
Now, armed with the ultimate pumpkin preservation guide, it’s time to unleash your inner artist and show the world what you’re capable of. Happy carving, and may your Halloween be filled with endless delight and wonder. Let’s make carved pumpkins last longer than ever!
Follow on Pinterest
Show us some love! Follow Love Beauty Thrive on Pinterest here. Save this post for later using this pin. As always, thanks so much for reading and for stopping by!

You May Also Like
Decorate Halloween Sugar Cookies Like a Pro
The 35 Best Halloween Movies For Kids & Families
Front Porch Decorating Ideas for Fall: An Ultimate Guide
12 Hygge Essentials For A Cozy Fall & Winter
6 Best ‘Bath & Body Works’ Fragrances To Make Your Home Smell Like Fall